Make Many Robots
Motor Driver Board L293D
Motor Driver Board L293D
Couldn't load pickup availability
This motor driver board is compact, cost-effective, and perfect for beginner-level robotics and DIY projects
Manufactured and tested by us.
Built to last.
Specifications:
-
Motor Driver IC: L293D
- Dual H-Bridge motor driver capable of driving 2 motors simultaneously.
- Operates in both forward and reverse directions.
-
Power Supply:
- Supports Li-ion battery packs or external power inputs.
- Voltage Range: Typically 4.5V to 12V for motors.
-
Motor Terminals:
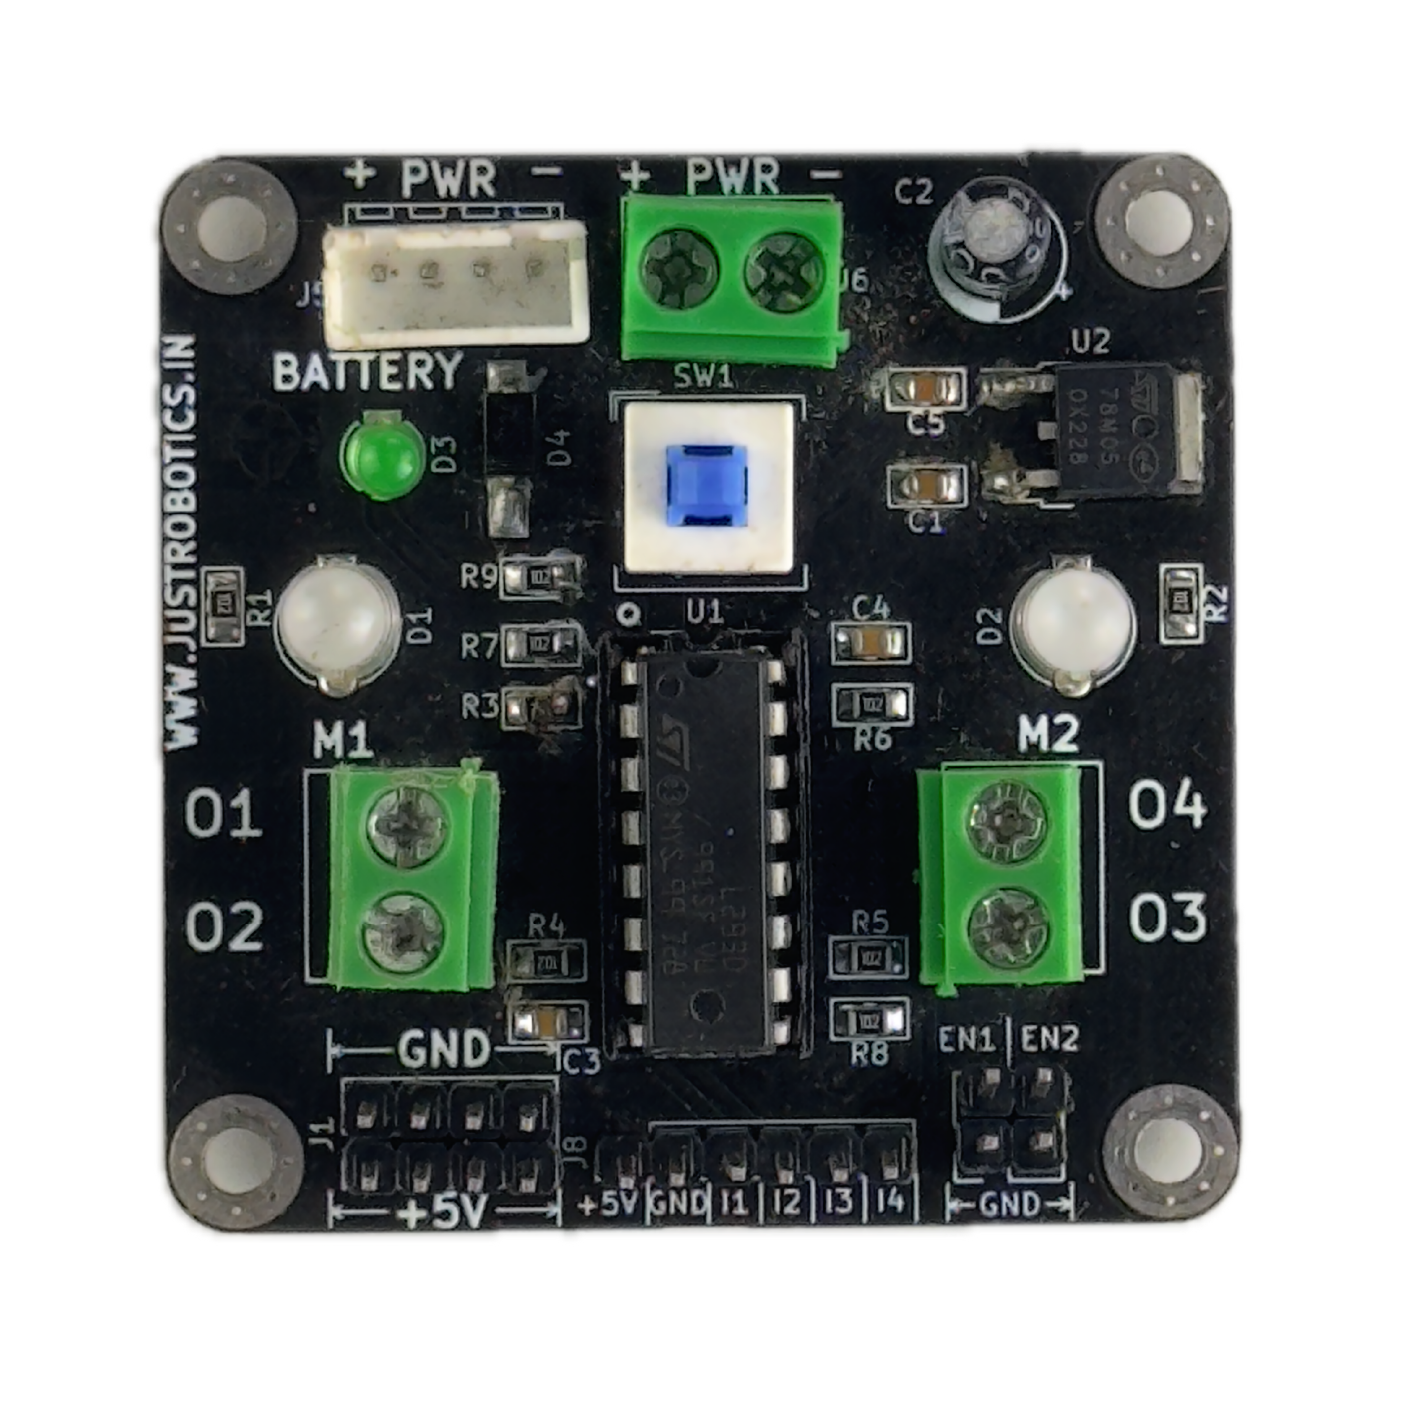
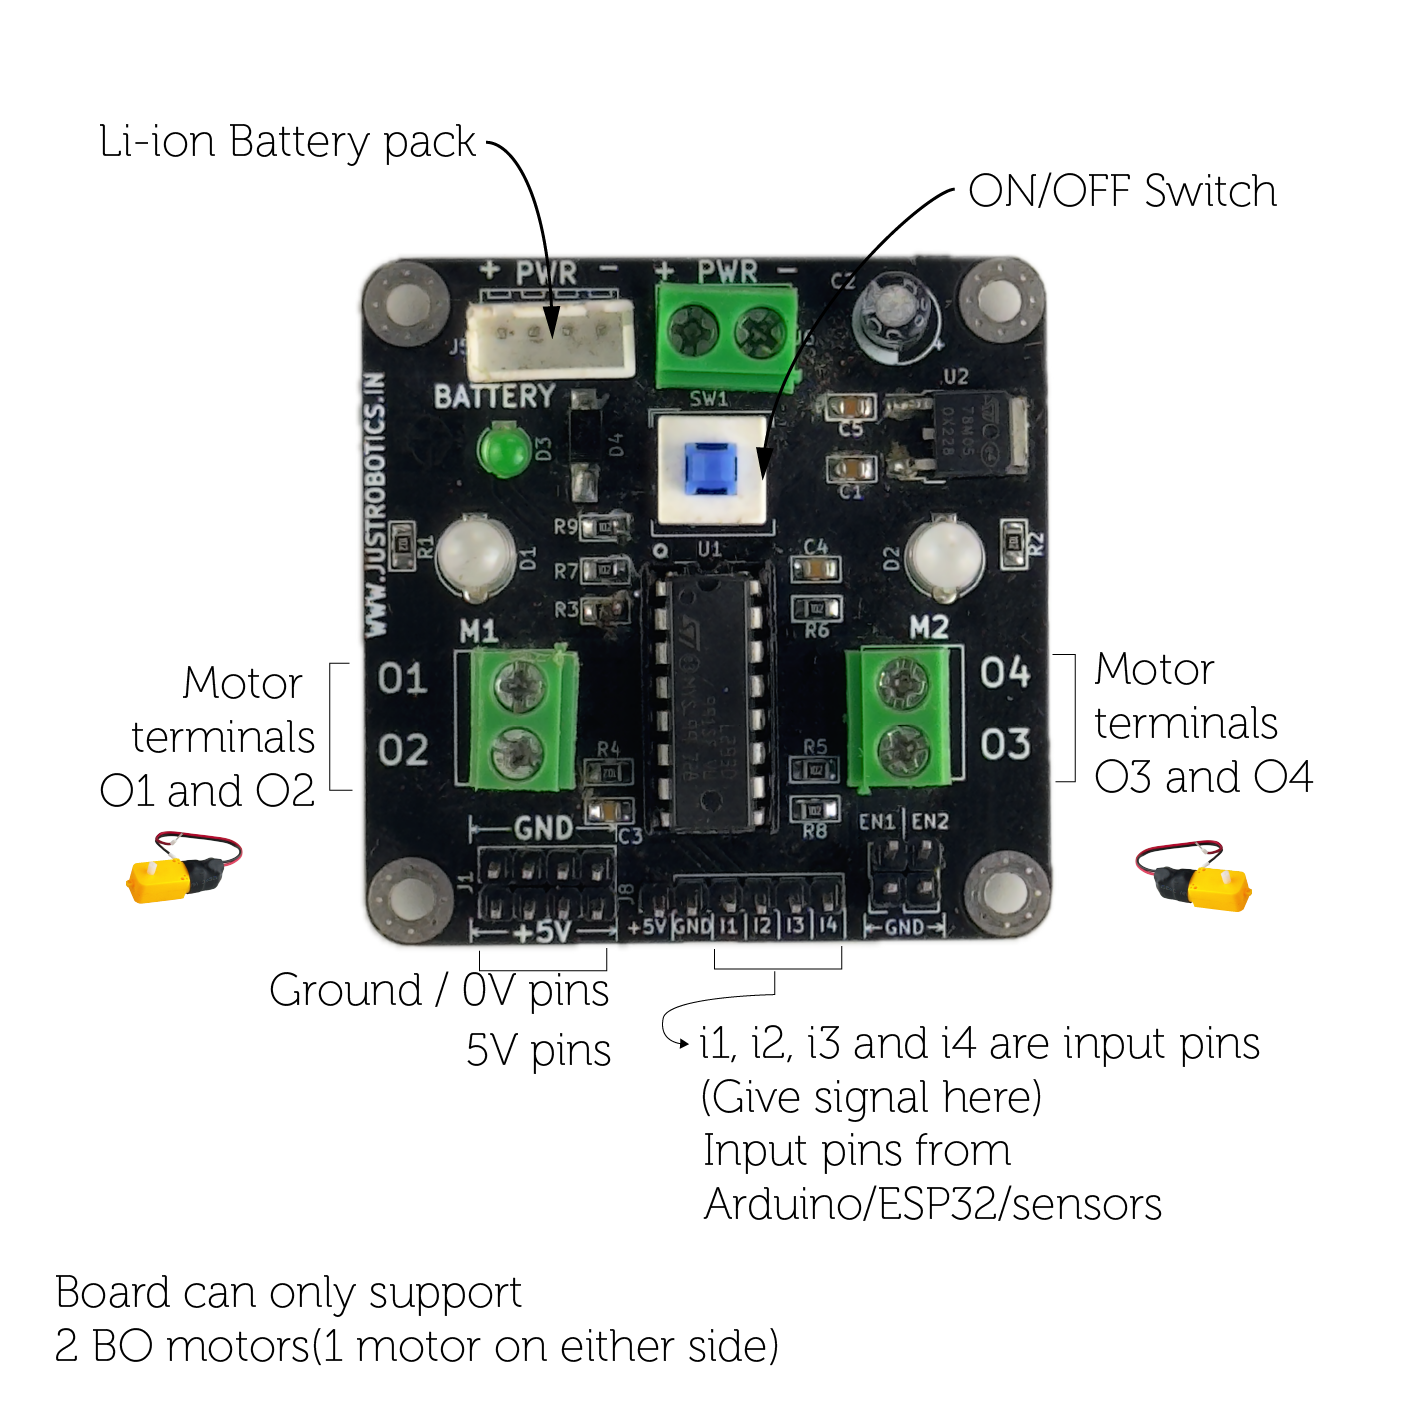
- O1 and O2: Output terminals for Motor 1.
- O3 and O4: Output terminals for Motor 2.
-
Control Pins:
-
i1, i2, i3, i4: Input pins to control motor movement.
- Connect these to Arduino/ESP32 GPIO pins or sensors.
-
Enable Pins (EN1, EN2):
- Used to enable/disable motors and control PWM for speed.
-
i1, i2, i3, i4: Input pins to control motor movement.
-
Current Rating:
- Output Current: 600mA per channel.
- Peak Current: 1.2A (non-repetitive).
-
Supported Motors:
- Up to 2 BO motors (one motor on each side).
Key Features:
- Supports bidirectional control (forward and reverse) for two motors.
- ON/OFF switch for easy power control.
- Dedicated 5V and GND pins for external components like sensors.
- Compatible with Arduino, ESP32, and similar microcontrollers.
- Ideal for small robots, car projects, and simple motor control applications.
How to Use:
-
Power the Board:
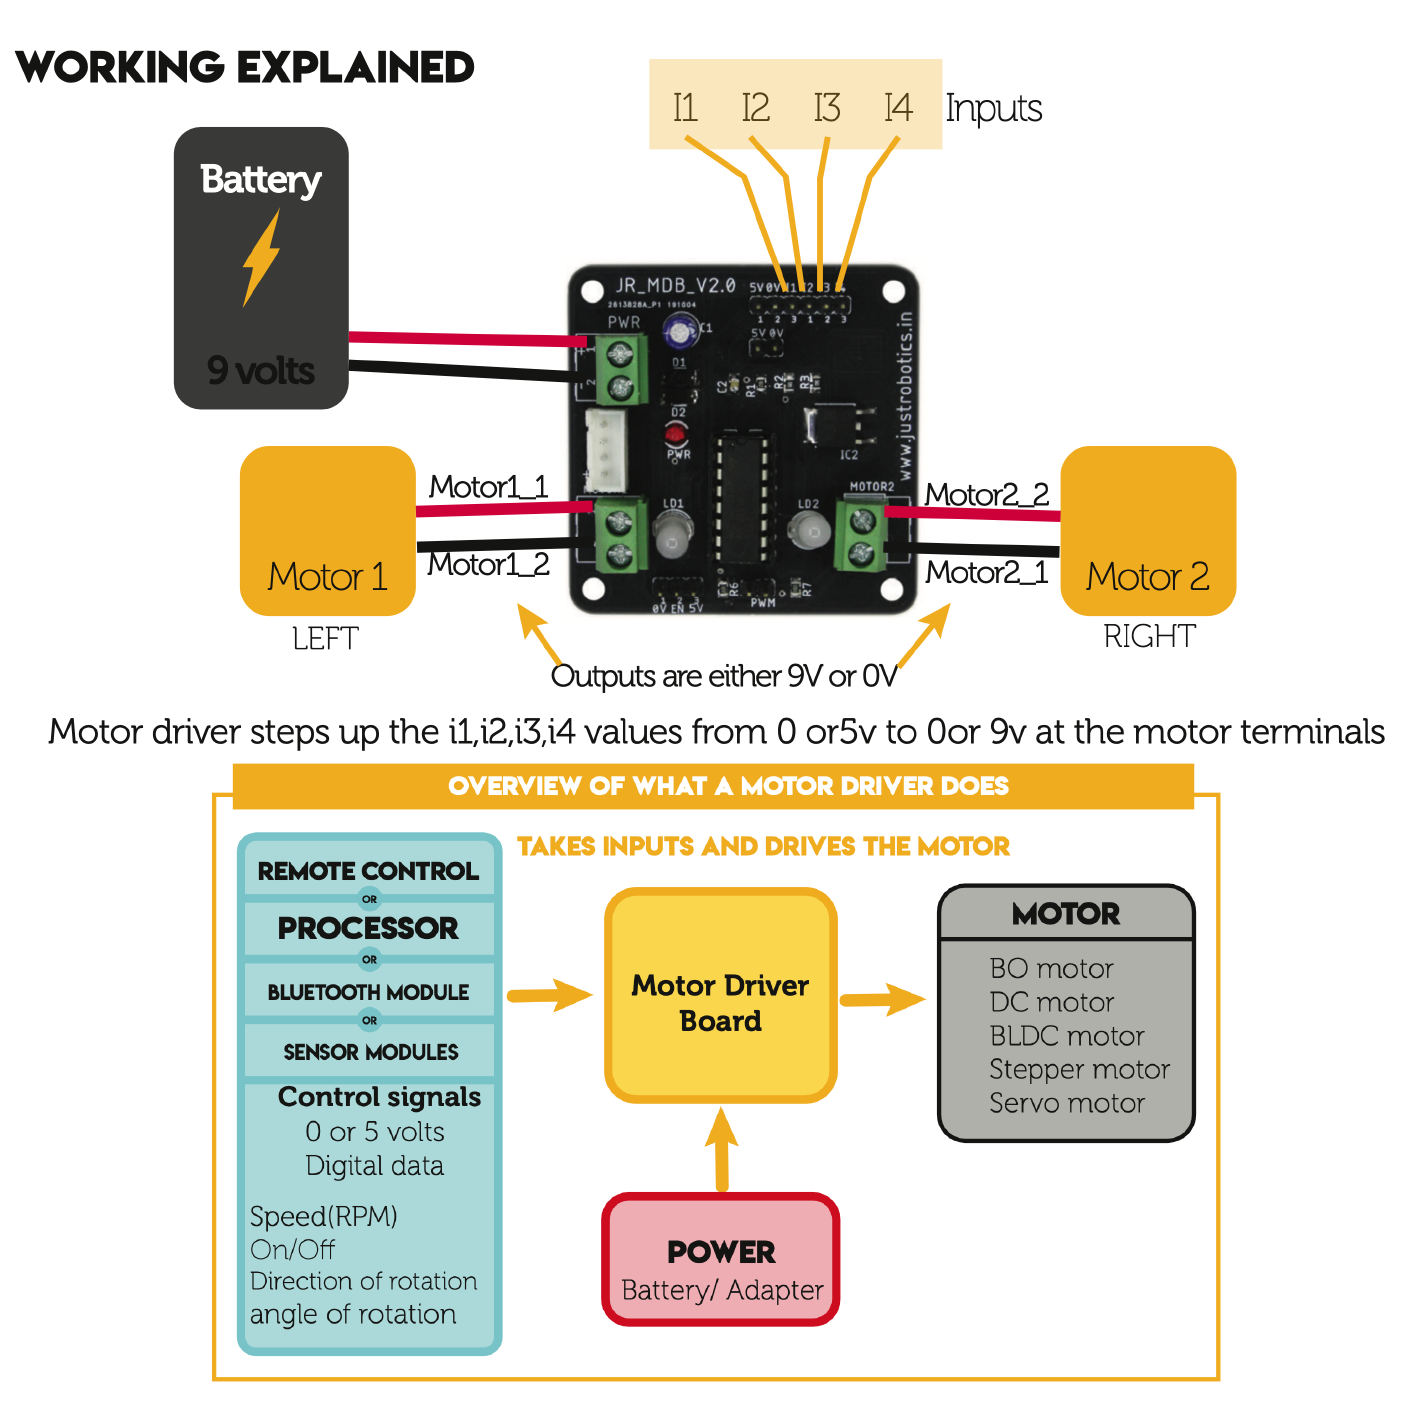
- Connect a Li-ion battery pack or external power supply to the PWR terminals.
-
Connect Motors:
- Connect the two motors to the respective O1/O2 and O3/O4 motor terminals.
-
Control Input Pins:
- Connect i1, i2, i3, and i4 to the digital pins of a microcontroller (Arduino/ESP32).
- Use the following logic for motor control:
- i1=HIGH, i2=LOW → Motor 1 Forward.
- i1=LOW, i2=HIGH → Motor 1 Reverse.
- i1=LOW, i2=LOW → Motor 1 Stop.
-
Enable Pins:
- Connect EN1/EN2 to 5V or use PWM to control motor speed.
-
Ground and Logic Pins:
- Ensure GND pins of the motor driver and microcontroller are connected.


Real Feedback, Real Experiences
-

Aniruddha, Grade 6
I was super excited to try out the robotics kit, but I wasn't sure if I could do it on my own. Thankfully, the website with the videos was super helpful! I followed the instructions step by step
-

Siddharth Machado
Hes sooooo into these things!. I ve never seen him smile like this when he's doing anything else.
such Joy-Parent of Siddharth
-
After teaching computer classes for 5 years, I wanted to broaden my skills into hardware, robotics, and IoT for our school curriculum. This course thoroughly covers all the basics, empowering me to introduce these exciting topics to our students confidently
FAQ's
Can students above 9 years of age do it?
Yes and No, they would certainly require some guidance and handholding, remember they are just starting out. Mentors would be happy to help them. The video is meant for anyone who is starting out.
What if some part is broken or go missing?
You can contact us and let us know which part. We ship the replacement part for free or at a minimal cost depending on the situation
Is Robotics really required for the kid? at such a young age?
Definitely yes! It depends on what and how they are being introduced to these subjects, time is drastically changing and only thing we can do is lay a strong foundation.
When is the ideal time to start Robotics?
As soon as they start developing fine motor skills, one can get started with DIY projects.
About 7-8 years most of them are ready for it.
What happens if they start learning robotics? Why Robotics?
Robotics is a practical way of learning.
Improves scientific inquiry.
Overall understanding of the systems and the way things work
Logical thinking and logical deduction get greatly enhanced.
Studies clearly show that children of age 8 are more creative compared to 16-year-olds.
is this course suitable for – graduates, science teachers, and engineers?
Absolutely! This course is designed to cater to a wide range of learners. Whether you're a recent graduate, a science teacher looking to enhance your curriculum, or an engineer interested in expanding your skill set, this course is perfect for you. It covers foundational concepts, from basic LED operation to software installation and coding, sensor usage, battery management, and motor control. Additionally, it serves as valuable training for educators seeking to impart robotics fundamentals, making it an ideal starting point for anyone venturing into the world of robotics


